How to Make Your Own Homemade Chicken Stock
We’ve been making our own chicken and beef stock for a while, but I want to start doing it more often, because it’s very, very good for you and provides a base for a lot of soups and sauces. As I understand it, a ‘stock’ is like a ‘broth’ except that a stock comes from bones and a broth comes from just meat. But those aren’t official definitions or anything, and I’ve heard people talk about ‘bone broth,’ so people seem to use them interchangeably. Homemade stock is great stuff. We both came back from vacation last weekend with sinus colds, so heating up some broth that we had frozen was just what we needed.
It’s very easy to make, and you don’t have to be too exact about the ingredients. You need some bones and/or meat from an animal, some vegetables, and a big stockpot. The standard vegetables are onions, carrots, and celery, but you can really toss in whatever you like. Here’s how we made our last batch of chicken stock.
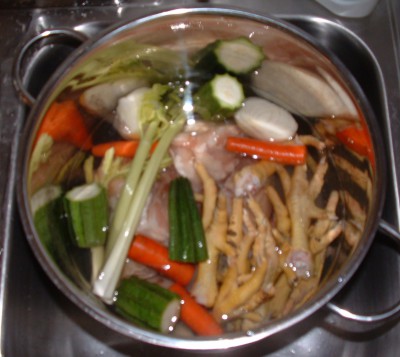
This is ready to go on the stove. I started with ten chicken backs — that’s a bony piece that you won’t find at the grocery store except in a whole chicken. You can also see about eight chicken feet in there. The feet add a lot of gelatin and minerals. It takes some scrubbing to make sure they’re really clean, but it’s worth it. They say you can buy them at Korean grocers, but around here you pretty much have to raise your own chickens if you want feet. You can also see an onion, some celery stalks, a couple carrots, and the dark green thing is a zucchini. Zucchinis are good sources of some minerals, so this is a way to get them without having to eat the things.
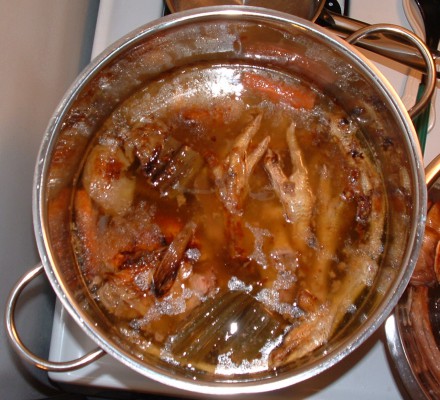
Then I add 1/4 cup of apple cider vinegar, which helps draw the minerals out of the bones, and fill the pot with filtered water until everything is covered. At that point, it goes on the stove on fairly high heat until it’s boiling, and then I turn it down to low to simmer, covered, for about 24 hours. I stir it every few hours, but mostly it can be left alone. When it’s done, it looks something like this.
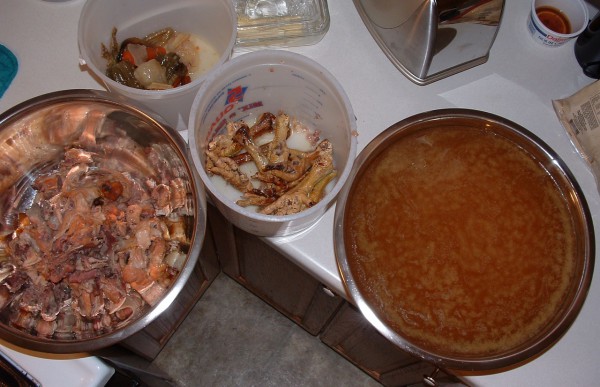
Doesn’t look all that appetizing, does it? Fortunately it smells and tastes a lot better than it looks. Now I get a tongs and start picking out the solid stuff, sorting it based on where it’s going to end up. Then I pour the liquid through a sieve to remove any small stuff I missed, and I end up with things looking like this:
The bucket in the middle has the feet, which go straight to the dog; there’s not enough meat on them to worry about. The bucket up top has the vegetables, which go to the chickens. The bowl on the left has the rest of the bones and meat. Once it cools a little, I’ll sort the meat from the bones, give the bones to the dog, and save the meat for soup or a casserole. (Not much gets wasted around here.) And the bowl on the right has the strained broth.
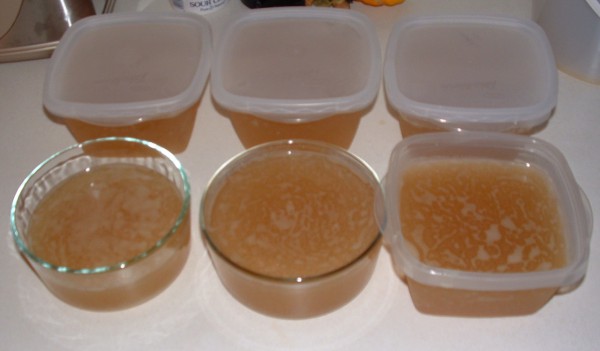
Usually I let the broth cool to room temperature, and then cool it further in the fridge. That causes the fat, which has risen to the top, to harden so it’s easy to remove. There’s nothing wrong with some fat in your broth, but too much will make it seem greasy, which you don’t want. In this case, these chicken backs must not have had much fat, because there was very little to skim off. Once I did that, I scooped it into containers, and we had almost six quarts ready for the fridge or freezer.
That may seem like a lot, but if you drink some hot and use it as a base for soups, it goes pretty fast. It’s excellent for gut health, especially if you’re trying to recover from past damage by gluten or other inflammatory substances, which is something I need to write about one of these days.
Although the process spans a couple days, the amount of time actually spent on it isn’t more than an hour or two. It doesn’t take long to clean and quarter some vegetables; and if you plan ahead, you can even cut that time. Keep a large freezer bag in your freezer, and when you need a couple stalks of celery or half an onion for a recipe, go ahead and clean up the whole onion or head of celery, and throw what you don’t use in that bag. Leftover bones from meals can go in the bag too. Then when you’re ready to make a batch of stock, the stuff in that bag is ready to go.
Although we don’t follow it exactly, the basic recipe comes from Nourishing Traditions, an excellent cookbook.
If you enjoyed this article, why not rate it and share it with your friends on Twitter, Facebook, or StumbleUpon?
loading...


